
Eltham Central Pavilion
| [bws_pdfprint display=”print”] |
This page is effectively a collation of the various guidance about the venue which has been sent out to the relevant tutors.
 Location and access


18 Panther Place, Eltham (click this hyperlink for a map).
Read our original 2021 note on our sharing arrangements with the sporting clubs, longer term vision and the parking situation.
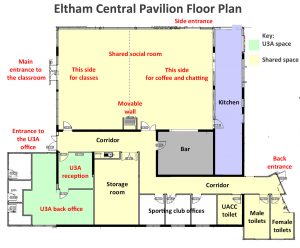
 Access to the inside of the building is via a key in a key safe which is located near the entrance to the U3A Office. The U3A key safe is on the right (branded Master). There are two keys: the one with the red handle opens all the external doors; and the one with the blacker handle opens the front room of our Office and the kitchenette cupboards. Email our Course Coordinator for the code to the key safe.
When the building is locked up and the keys returned to the key safe. Check that the safe is securely locked.
The building is alarmed. The tutor of the first class of each day knows how to switch off the alarms and the tutor of the last class of the day knows how to switch them on. Email our Course Coordinator for code for turning off/on the alarm system.
Summary
- Parking: most parking has a 3 hour limit; permit only longer parking is available at the rear of the pavilion – contact the office for details
- Tables and chairs: the tables and chairs are in the storage room.
- Audiovisual and wifi equipment: the equipment is all built in.
- There is a list of classes on the wall in the class room so you can see which classes are before and after you.
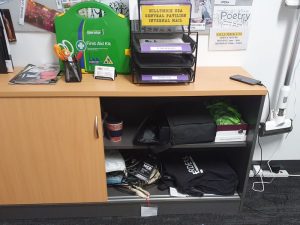 The front room of our Office is open to the tutors. It includes a photocopier and a cupboard with miscellaneous equipment.
- The back room of our Office is not open to the tutor except during Office hours (i.e. Monday afternoons and Thursday mornings) or when Office staff are in attendance.
- Take care when either putting up, or taking down, the moveable wall that divides the main room into two. Do not force it. If unsure, please talk to the Office or to our Course Coordinator.
- Tea and coffee: the kitchen volunteers will provision the kitchenette.
- Keys: if you are not the last class of the day, hand the keys onto the next tutor.

Checklist for the last tutor of the day
- Shutdown the projector if it is not already shutdown.
- Check that the tea and coffee cupboards are all locked and the kitchen area is wiped down.
- Turn off the lights and make sure the air conditioners are all switched off.
- Check that all the external doors are locked.
- Switch the alarm system on.
- Put the keys in the key safe and check that the key safe is actually locked.
 The security system
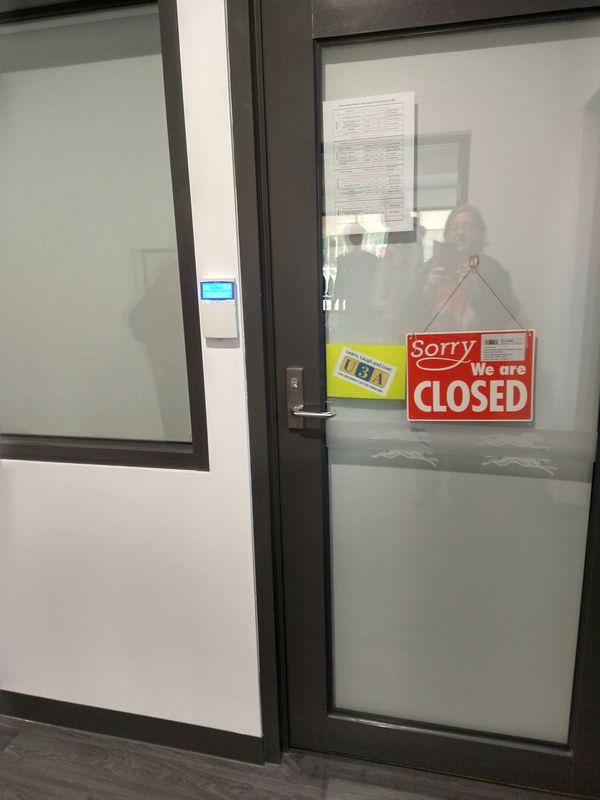
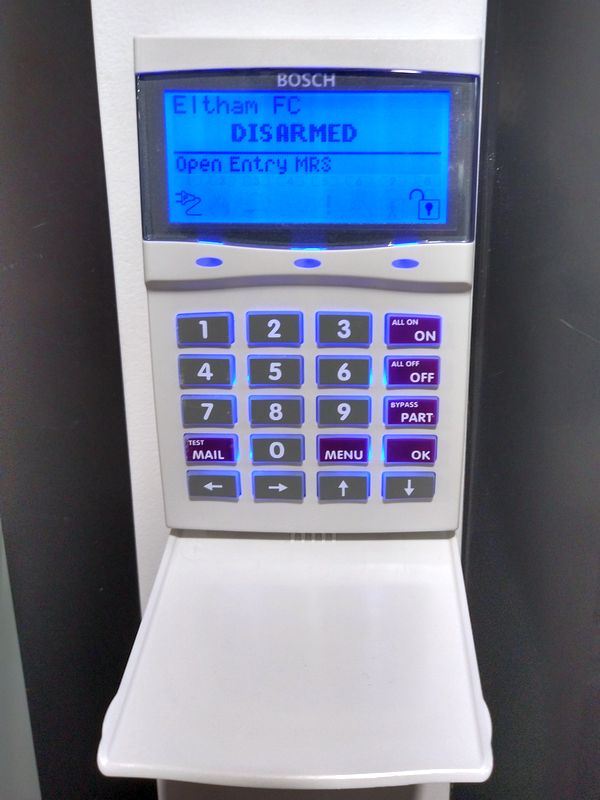
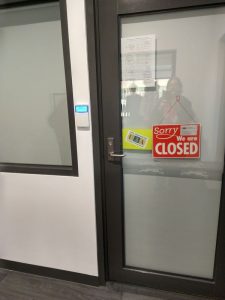
The first person to enter the pavilion each day will need to disarm the alarm system. You must enter via the solid door that leads into the corridor and our Office (not the glass door into the classroom). Once in the building you have 40 seconds to disarm the alarm which is located next to the Office door.
- Open the flap.
- Key in the 4 digit code.
- And then press OFF.
- Close the flap.
If you are the last to leave and there are no football or cricket members in attendance, you must turn the security system back on. Make sure you are ready to leave, all items packed and by the door closest to the security system. Check that both classroom exit doors and the door at the far end of the corridor are locked and shut firmly.
- Open the flap.
- Key in the 4 digit code.
- And then press ON.
- Close the flap.
You then have 40 seconds to exit the building via the main solid door at the end of the corridor.
If the alarm goes off immediately after the 40 seconds, this means that one of the alarmed doors is open (these doors include all the external doors plus, oddly, the toilet doors). The tutor should then obviously return to the building to try and rectify the situation by reading the message on the control panel. If the tutor can’t easily find the relevant door and close it, they should then just leave the building without switching on the alarm.
Note that the code will change each year at the start of each sporting season: April for start of football and September for start of cricket.
Equipment
The main equipment is built-in and shared with the sporting clubs.
- Projector, screen and speakers: all built-in. You can connect either via hdmi or via the wireless network.
- Network: built-in.
- Microphones: a variety of wireless microphones are available.
- Hearing loops: 4 individual hearing loops are available.
- Defibrillator: our fully automated standard model.
Backup equipment
The backup equipment is kept in the tutor’ cupboard and comprises.
- Backup projector: can be used in conjunction with your laptop in the built-in projector is not working; connects via hdmi for visuals and, if needed, a separate cable for sound.
- Backup laptop: can be used in conjunction with the projector, screen and speakers if your laptop can’t connect successfully.
- Backup speakers: can physically plug into your laptop if you can’t get the building’s built-in speakers to work.
Sometimes the built-in projector stops working and we have to wait for Council to repair it. This can take a few days, hence the provision of the backup projector.
Some laptops, particularly those with multiple graphics cards, do not automatically connect to the built-in projector, screen and speakers, either with no connection or with connected video but no sound. This can often be rectified by changing some of the settings on the laptop, for example setting ‘multiple displays’ to ‘extend’ rather than to ‘duplicate’ and/or forcing the laptop to use only one of the graphics cards. For those who cannot get things working, we have established some backup methods:
- If you can’t connect for either video or sound: use the backtop laptop that is in the tutors’ cupboard on the right hand side of the cabinet on the back wall of the front room of our Office.
- If you can connect for video but not for sound: either use the backup laptop as above or use the backup speakers which are also in the tutors’ cupboard.
Any issues, contact Guy by phone (0411 520 850) or email.
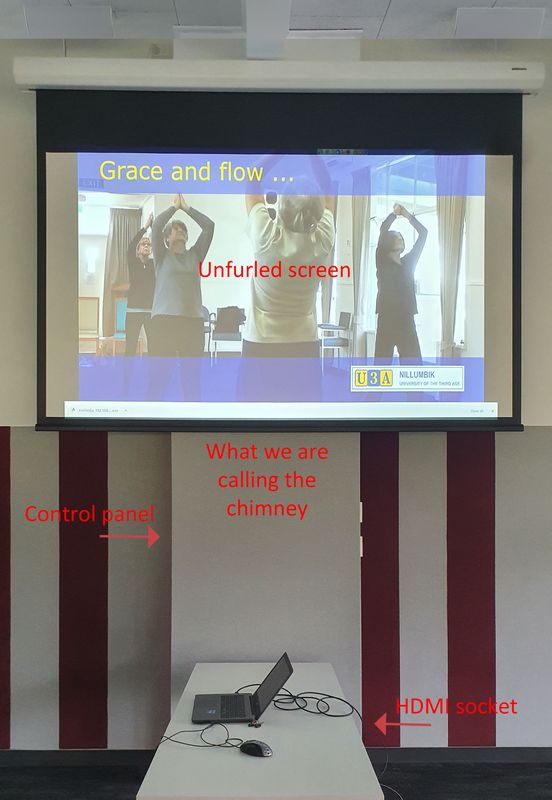
The projector, screen and speakers
Control panelThe projector, screen and speakers are all affixed to the ceiling. The controls for the system are via a wall-mounted screen (rather than via a remote), but they are pretty simple controls, namely: power on/off; connect via hdmi or wirelessly; and volume adjustment. |
 |
 |
The screenThere is delay of a few minutes between switching the system on at the wall-mounted control panel and the system actually coming on. So, be patient! When the system is activated, the screen automatically unfurls (and furls back up when the system is shut down). This screen is on the left hand (aka north) side of what we are calling the ‘chimney’ at about eye height. |
 |
 |
The projector and speakersThe projector is mounted on the ceiling. The speakers are mounted on both sides of the screen, also on the ceiling. |
 |
 |
Connectivity
There are two ways to connect your laptop to the equipment, both providing the same functionality:
1. Via an hdmi cable.
2. Via the wireless network.
Once you have mastered it, many people will find connection via the wireless network the preferable method because it involves no wires and thus you can put your laptop anywhere in the room.
If you move from one form of connection to the other, the sound can sometimes cease. This is usually because it becomes muted on your laptop and the solution is to unmute it.
You can also connect your smart phone or tablet wirelessly to the equipment but it is only visual, with no audio.
Some people who want to connect their laptop via hdmi might lack an hdmi port on their laptop. Examples are owners of mini laptops and owners of Apple Macs. To cater for such people, we have acquired a number of convertors which can be plugged into this machinery on one side and into an hdmi cable on the other side. These convertors are stored in the tutor cupboard. They are easy to use but, if wanting to use them for the first time, you might want to contact Guy by phone (0411 520 850) or email (guy@nillumbiku3a.org.au). There are two convertors:
- USB-C to HDMI (for mini laptops).
- Mini Display Port to HDMI (for Apple Macs).
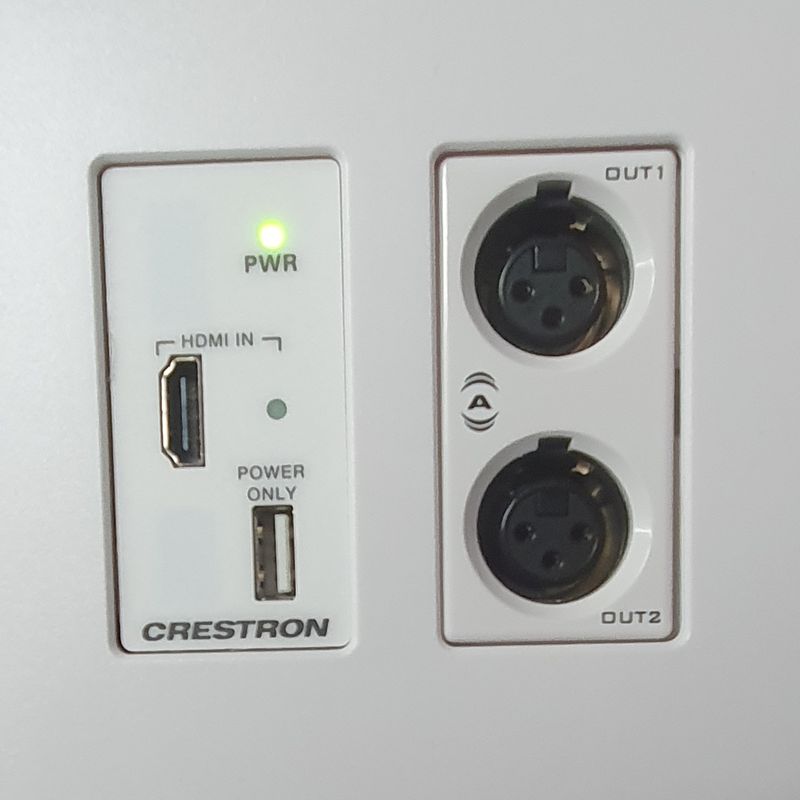
Connecting via hdmi cable
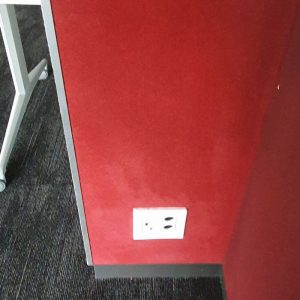
The hdmi socket is on the right hand (aka south) side of the ‘chimney’, around 10 cms above the ground.
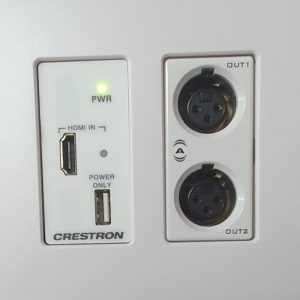
 At the control panel, power on the system and then choose ‘hdmi presentation’.
- Position your laptop near the ‘chimney’, plug in one end of an hdmi cable into your laptop and the other end into the wall socket near the ground labelled ‘hdmi in’. (Most tutors bring their own hdmi cables but we also have a spare cable in the tutor cupboard bottom left.)
- Everything should work automatically. If not, fiddle around with the display settings and sound settings on your laptop like you always have to sometimes with hdmi.
The network
There is a permanent 24/7 wireless network which connects to the Internet. Its name is ‘Panther wifi’. Email our Course Coordinator for the password.
The network covers the whole of the building.
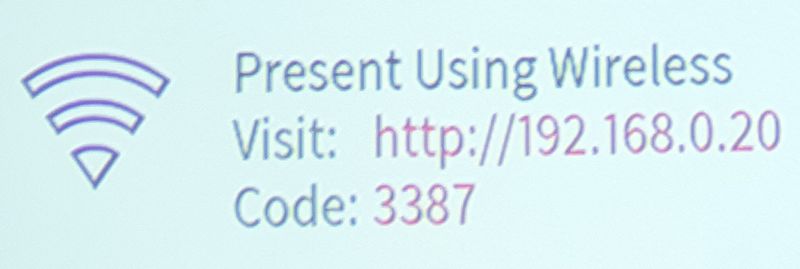
Connecting via the wireless network
 At the control panel, power on the system and then choose ‘wireless presentation’.
- Connect your laptop to the Panther wifi network. (Once you have done this once, your laptop might start connecting automatically in future.)
- Open your browser and go to url 192.168.0.250.
- If it is your first time, it will then prompt you to download, install and then open some software called ‘AirMedia Application’. For subsequent times, it will either simply prompt you to open the software or it will open the software automatically for you.
- When the software is running, you have to type in a 4-digit access code into a box that pops up. The access code, which will be different every time, can be found by looking at the bottom left of the project screen.
 Everything should work automatically.
- When it is working, a simple control panel appears on the screen which you don’t need to use but which may be handy in some circumstances.

Microphones
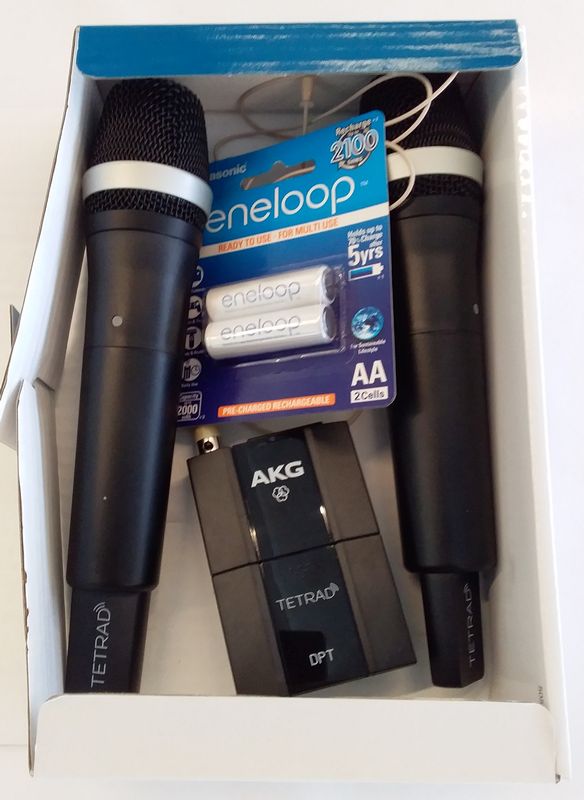
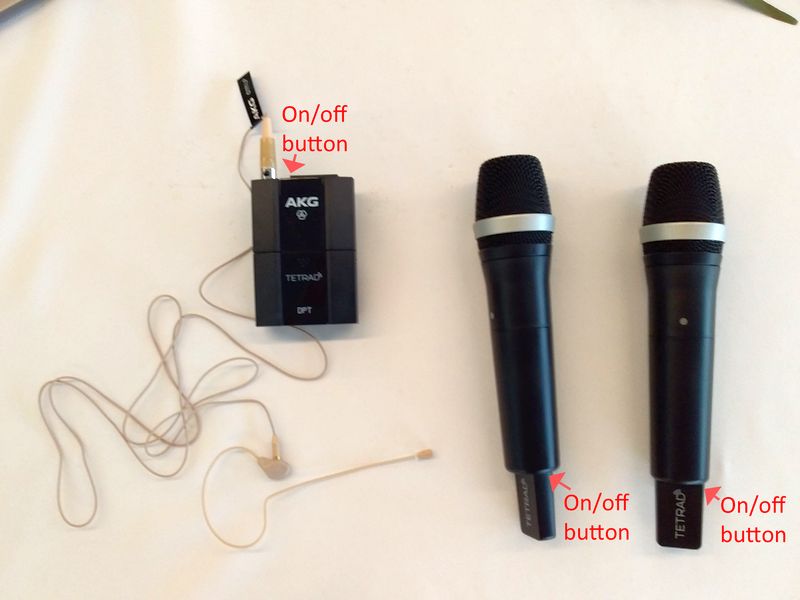 There are 3 wireless microphones, 1 that goes round your ear and 2 handheld. They each have an on/off button. When switched on, they should automatically work.
Because the microphones are also be used by the sports clubs, they need to be in a shared area and are currently kept in the store room, usually on a table on the right as you walk in.
Each of the three microphones is powered by 2 rechargeable AA batteries. We have agreed with the
sports clubs that each party should use its own batteries.
We keep our batteries in a charger which sits on the desk
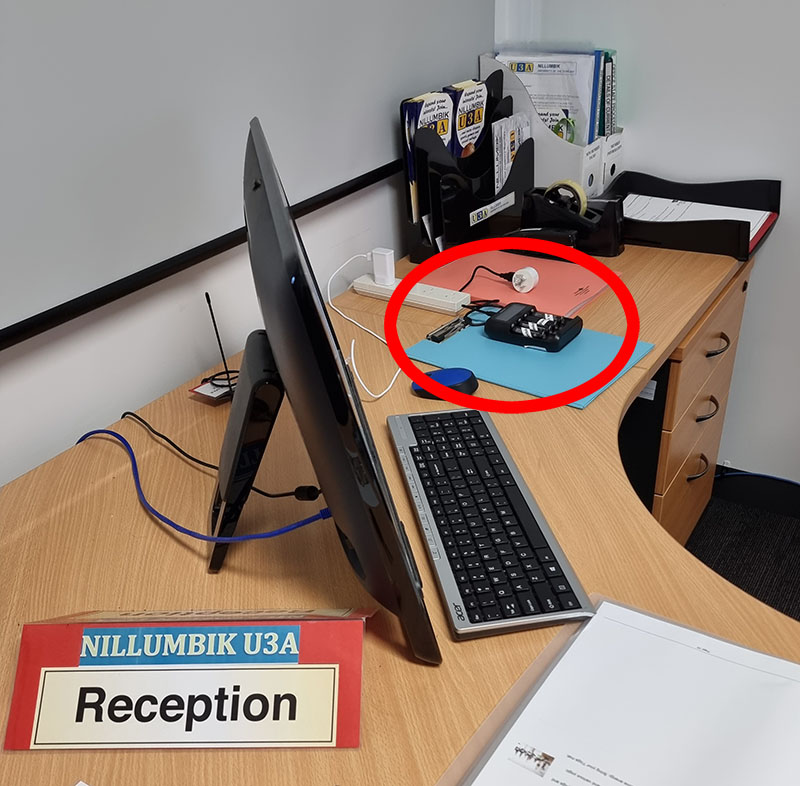
 in the reception area.
To change the batteries in the hand held microphones, unscrew the bottom half of the microphone from the top half. Whilst the join is hardly visible, just grip near the bottom with one hand and near the top with the other hand, and turn anti-clockwise.
Microphones use quite a lot of power and need to be charged quite often so we have someone who is responsible for doing this every Monday. To make sure that they can find the batteries, return them to the charger after you have used the microphone.
| The volume levels of the microphones can be adjusted from the microphones tab on the wall-mounted control panel. |  |
Individual hearing loops4 individual hearing loops are available. They automatically connect to the overall audiovisual system and are basically only relevant if the microphones are being used. Each hearing loop comprises three components: a receiver, a neckloop and some headphones. For those with hearing aids, they can be used by setting the aid to ‘T’ (Telecoil) setting. For those without hearing aids, they can be used by plugging in the headphones. The receiver has a on/off button and a volume control. The hearing loops are being stored in the tutors’ cupboard. |
 |

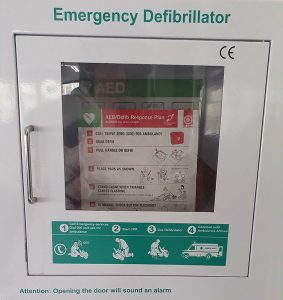 The defibrillator

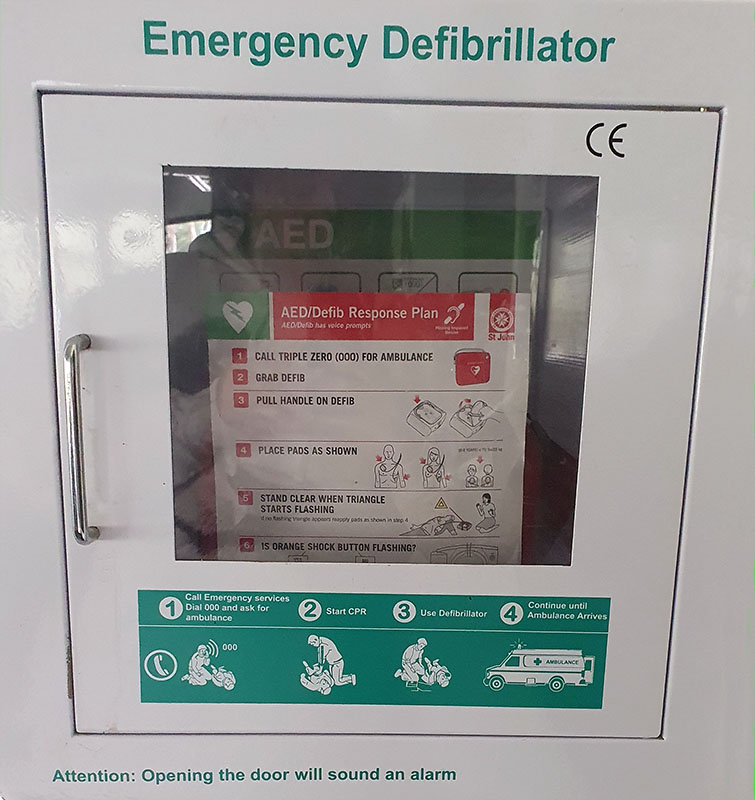
The defibrillator is mounted on the wall at the far end of the main room, just to the right of the door leading to the kitchen.
The latest information about our defibrillators can always be found on our defibrillators’ page.